2006年11月22日

 GIMP2.2

↓こちらからダウンロードして 自分で改造した1.2 用のスクリプトをテストしてみました
http://www.geocities.jp/gimproject2/download/gimp-download.html

結局、定数に使われて使えていた _ (アンダーバー) が - (ハイフン) でないと動かなかったのと、
フォントの変更(GUI)が扱いにくいのと、重い事が解りました。

; 【キャンバス作成】
; この時点では黒いキャンバスが作成されます

; **********************************************************
; script-fu-util.scm より
; **********************************************************
(define
	(lightbox-global-image-resize-from-layer
		image
		layer
	)
	(let*
		(
			(width (car (gimp-drawable-width layer)))
			(height (car (gimp-drawable-height layer)))
			(posx (- (car (gimp-drawable-offsets layer))))
			(posy (- (cadr (gimp-drawable-offsets layer))))
		)
		; 戻り値
		(gimp-image-resize image width height posx posy)
	)
)

; **********************************************************
; basic2-logo.scm より
; **********************************************************
(define 
	(lightbox-global-color-highlight
		color
	)
	(let
		(
			(r (car color))
			(g (cadr color))
			(b (caddr color))
		)
		(set! r (+ r (* (- 255 r) 0.75)))
		(set! g (+ g (* (- 255 g) 0.75)))
		(set! b (+ b (* (- 255 b) 0.75)))
		(list r g b)
	)
)

; **********************************************************
; basic2-logo.scm より
; **********************************************************
(define
	(lightbox-global-apply-logo-effect
		img
		logo-layer
		 bg-color
		text-color
		shadow-offset
	)
	(let*
		(
			(width (car (gimp-drawable-width logo-layer)))
			(height (car (gimp-drawable-height logo-layer)))
			(posx (- (car (gimp-drawable-offsets logo-layer))))
			(posy (- (cadr (gimp-drawable-offsets logo-layer))))
			(bg-layer
				(car
					(gimp-layer-new
						img
						width
						height
						RGB-IMAGE
						"Background"
						100
						NORMAL-MODE
					)
				)
			)
			(highlight-layer (car (gimp-layer-copy logo-layer TRUE)))
			(shadow-layer
				(car
					(gimp-layer-new
						img
						width
						height
						RGBA-IMAGE
						"Shadow"
						100
						MULTIPLY-MODE
					)
				)
			)
			(old-fg (car (gimp-palette-get-foreground)))
			(old-bg (car (gimp-palette-get-background)))
		)
		(gimp-selection-none img)
		(lightbox-global-image-resize-from-layer img logo-layer)
		(gimp-image-add-layer img bg-layer 1)
		(gimp-image-add-layer img shadow-layer 1)
		(gimp-image-add-layer img highlight-layer 1)
		(gimp-palette-set-foreground text-color)
		(gimp-layer-set-preserve-trans logo-layer TRUE)
		(gimp-edit-fill logo-layer FG-IMAGE-FILL)
		(gimp-edit-clear shadow-layer)
		(gimp-palette-set-foreground (color-highlight text-color))
		(gimp-layer-set-preserve-trans highlight-layer TRUE)
		(gimp-edit-fill highlight-layer FG-IMAGE-FILL)
		(gimp-palette-set-background bg-color)
		(gimp-drawable-fill bg-layer BG-IMAGE-FILL)
		(gimp-selection-layer-alpha logo-layer)
		(gimp-palette-set-background '(0 0 0))
		(gimp-selection-feather img 7.5)
		(gimp-edit-fill shadow-layer BG-IMAGE-FILL)
		(gimp-selection-none img)
		(gimp-palette-set-foreground '(255 255 255))
		(gimp-layer-translate shadow-layer shadow-offset shadow-offset)
		(gimp-layer-translate highlight-layer (- posx 2) (- posy 2))
		(gimp-layer-set-name highlight-layer "Highlight")
		(gimp-palette-set-background old-bg)
		(gimp-palette-set-foreground old-fg)
	)
)

; **********************************************************
; レイヤー作成関数
; **********************************************************
(define
	(lightbox-global-create-layer
		img
		imgWidth
		imgHeight
		imgName
	)
	(let*
		(
			(layer (car (gimp-layer-new
				img
				imgWidth
				imgHeight
				RGB-IMAGE
				imgName
				100
				NORMAL-MODE
			)))
		)
		; 戻り値
		layer
	)
)

; **********************************************************
; 画面に対応した、基本キャンバス作成関数
; **********************************************************
(define
	(lightbox-canvas
		imgWidth
	)
	(let*
		(
			(img (car (gimp-image-new
				imgWidth
				imgWidth
				RGB
			)))
			(layer (lightbox-global-create-layer
				img
				imgWidth
				imgWidth
				"base"
			))
		)
		; 背景色で塗りつぶし
		(gimp-drawable-fill layer BG-IMAGE-FILL)
		; 画像にレイヤーを追加( 位置先頭 )
		(gimp-image-add-layer img layer 0)
		; 表示
		(gimp-display-new img)
	)
)

; 実行パラメータの入力画面登録
; 1) 呼び出される関数名
; 2) 登録されるパス
; 3) コメント
; 4) 名前
; 5) 著作権情報
; 6) 日付
; 7) 画像モード( 通常 "" )
; 
(script-fu-register
	"lightbox-canvas"
	"<Toolbox>/Xtns/Script-Fu/lightbox スクリプト/正方形キャンバス作成"
	"Create Simple Canvas : 簡単なキャンバス作成とグローバル関数"
	"lightbox"
	"lightbox"
	"2006/11/06"
	""
	SF-ADJUSTMENT "Width" '(256 20 2000 1 10 0 1)
)

; 【ドロップシャドウロゴ】
; basic2-logo.scm より
; HIGHLIGHT-DROP-SHADOW-LOGO
; draw the specified text over a background
; with a drop shadow and a highlight

(define
	(lightbox-logo-01
		text
		size
		font
		baseWidth
		bg-color
		text-color
		left-top-line
		right-bottom-line
		shadow-offset
		auto-width
	)
	(let*
		(
			(img (car (gimp-image-new 256 256 RGB)))
			(text-layer
				(car
					(gimp-text-fontname
						img -1 0 0 text 10 TRUE size PIXELS font
					)
				)
			)
		)
		(gimp-image-undo-disable img)
		(gimp-layer-set-name text-layer text)
		(lightbox-global-apply-logo-effect
				img text-layer bg-color text-color shadow-offset
		)
		(gimp-image-undo-enable img)

		; lightbox add
		(if (= auto-width FALSE)
			(begin
				(set! imgwidth baseWidth)
				(set! imgheight (- (car (gimp-image-height img)) 8))
				(gimp-image-resize img imgwidth imgheight -4 -4)
				(set! new-layer 
					(lightbox-global-create-layer
						img
						imgwidth
						imgheight
						"Layer 1"
					)
				)
				(gimp-image-merge-visible-layers img 1)
				(gimp-image-add-layer img new-layer 1)
				(gimp-palette-set-background bg-color)
				(gimp-drawable-fill new-layer BG-IMAGE-FILL)
				(set! new-layer (car (gimp-image-merge-visible-layers img 1)))
			)
		)
		(if (= auto-width TRUE)
			(begin
				(set! imgwidth (car (gimp-image-width img)))
				(set! imgheight (- (car (gimp-image-height img)) 8))
				(gimp-image-resize img imgwidth imgheight 0 -4)
				(set! new-layer 
					(lightbox-global-create-layer
						img
						imgwidth
						imgheight
						"Layer 1"
					)
				)
				(gimp-image-merge-visible-layers img 1)
				(gimp-image-add-layer img new-layer 1)
				(gimp-palette-set-background bg-color)
				(gimp-drawable-fill new-layer BG-IMAGE-FILL)
				(set! new-layer (car (gimp-image-merge-visible-layers img 1)))
			)
		)

		; 選択範囲の塗りつぶし
		(if (= left-top-line TRUE)
			(begin
				(gimp-rect-select img 0 0 imgwidth 1 REPLACE FALSE 0)
				(gimp-palette-set-foreground '(200 200 200))
				(gimp-edit-fill new-layer 0)
				(gimp-selection-none img)

				(gimp-rect-select img 0 0 1 imgheight REPLACE FALSE 0)
				(gimp-palette-set-foreground '(200 200 200))
				(gimp-edit-fill new-layer 0)
				(gimp-selection-none img)
			)
		)
		(if (= right-bottom-line TRUE)
			(begin
				(gimp-rect-select
					img (- imgwidth 1) 0 imgwidth imgheight REPLACE FALSE 0
				)
				(gimp-palette-set-foreground '(100 100 100))
				(gimp-edit-fill new-layer 0)
				(gimp-selection-none img)

				(gimp-rect-select
					img 0 (- imgheight 1) imgwidth imgheight REPLACE FALSE 0
				)
				(gimp-palette-set-foreground '(100 100 100))
				(gimp-edit-fill new-layer 0)
				(gimp-selection-none img)
			)
		)

		; 
		(gimp-display-new img)
	)
)

(script-fu-register
	"lightbox-logo-01"
	"<Toolbox>/Xtns/Script-Fu/lightbox スクリプト/ロゴ 01"
	""
	""
	""
	""
	""
	SF-STRING		"テキスト" "ボタン"
	SF-ADJUSTMENT	"サイズ (ピクセル)" '(24 2 1000 1 10 0 1)
	SF-FONT	  		"フォント" "MS PGothic"
	SF-ADJUSTMENT	"幅" '(300 20 2000 1 10 0 1)
	SF-COLOR		"背景色" '(255 255 255)
	SF-COLOR		"テキスト色" '(206 6 50)
	SF-TOGGLE		"左と上に線を引く" TRUE
	SF-TOGGLE		"右と下に線を引く" TRUE
	SF-ADJUSTMENT	"影のオフセット" '(3 0 5 1 10 0 1)
	SF-TOGGLE		"文字と幅を合わせる" FALSE
)


2006年11月13日

 汎用ロゴ作成スクリプトと炎作成用グラデーション

basic2-logo.scm を改造したものですが、オリジナルよりは一般的に使えると思います

GIMP1.2用

GIMP2.2用
( ロゴのみ )

解凍して、scripts ディレクトリにあるファイルを
GIMP がインストールされている以下のようなディレクトリにコピーして下さい

C:\Program Files\GIMP\share\gimp\1.2\scripts

gradients ディレクトリには、炎画像を作成する為のグラデーションが入って
います。上記と同様に以下のようなディレクトリにコピーして下さい

C:\Program Files\GIMP\share\gimp\1.2\gradients

↓炎画像のサンプル

--------------------------------------------------------------
11/14
● 元々の機能を忘れてたので実装(テキスト幅に合わせる)
● 背景色が白以外では処理できて無かったので修正

 戻り値を持つ関数

キャンバス作成で使用している gimp-layer-new 関数をユーザ関数で置き換えます。

※ 呼び出し元で car を使用していない事に注意して下さい( car を使うとエラーになります )

; 【キャンバス作成】
; この時点では黒いキャンバスが作成されます

; **********************************************************
; レイヤー作成関数
; **********************************************************
(define
	(script-fu-lightbox-global-create-layer
		img
		imgWidth
		imgHeight
		imgName
	)
	(let*
		(
			(layer (car (gimp-layer-new
				img
				imgWidth
				imgHeight
				RGB-IMAGE
				imgName
				100
				NORMAL-MODE
			)))
		)
		; 戻り値
		layer
	)
)

; **********************************************************
; 画面に対応した、基本キャンバス作成関数
; **********************************************************
(define
	(script-fu-lightbox-canvas
		imgWidth
	)
	(let*
		(
			(img (car (gimp-image-new
				imgWidth
				imgWidth
				RGB
			)))
			(layer (script-fu-lightbox-global-create-layer
				img
				imgWidth
				imgWidth
				"base"
			))
		)
		; 背景色で塗りつぶし
		(gimp-drawable-fill layer BG-IMAGE-FILL)
		; 画像にレイヤーを追加( 位置先頭 )
		(gimp-image-add-layer img layer 0)
		; 表示
		(gimp-display-new img)
	)
)

; 実行パラメータの入力画面登録
; 1) 呼び出される関数名
; 2) 登録されるパス
; 3) コメント
; 4) 名前
; 5) 著作権情報
; 6) 日付
; 7) 画像モード( 通常 "" )
(script-fu-register
	"script-fu-lightbox-canvas"
	"<Toolbox>/Xtns/Script-Fu/lightbox-Script/Create Simple Canvas"
	"Create Simple Canvas : basic script and global functions"
	"lightbox"
	"lightbox"
	"2006/11/06"
	""
	SF-ADJUSTMENT "Width" '(256 20 2000 1 10 0 1)
)

2006年11月07日

 キャンバス作成

入力した幅と同じ高さを持った、現在の背景色で塗ったキャンバスを作成します


  1. imgWidth x imgWidth の画像を作成して img にハンドルをセット
  2. img に 所属するレイヤーを作成して、layer にハンドルをセット
  3. layer を背景色で塗る
  4. img に layer を 先頭に実装
  5. img を表示


  1. 処理は ( と ) で囲まれます
  2. define は、【関数】で、script-fu-lightbox-01 は、【関数名】です
  3. imgWidth は【引数】です
  4. script-fu-register は、【画面の設定】で、"script-fu-lightbox-01" を呼び出します
  5. その際、SF-ADJUSTMENT の【値】が渡されます
  6. let* は、ローカル変数の定義と処理を同時に書く方法ですが、結果的に【関数の実体】です
  7. let* の次の階層の ( 〜 ) で、ローカル変数の定義とその初期値を設定します
  8. gimp-.... は、gimp の関数です。DBブラウザで仕様を見る事ができます

(define
	(script-fu-lightbox-01
		imgWidth
	)
	(let*
		(
			(img (car (gimp-image-new
				imgWidth
				imgWidth
				RGB
			)))
			(layer (car (gimp-layer-new
				img
				imgWidth
				imgWidth
				RGB-IMAGE
				"base"
				100
				NORMAL-MODE
			)))
		)
		(gimp-drawable-fill layer BG-IMAGE-FILL)
		(gimp-image-add-layer img layer 0)
		(gimp-display-new img)
	)
)

(script-fu-register "script-fu-lightbox-01"
	"<Toolbox>/Xtns/Script-Fu/lightbox/sample 01..."
	""
	"lightbox"
	"lightbox"
	"2006"
	""
	SF-ADJUSTMENT "Width" '(256 16 1024 1 10 0 1)
)

SF-ADJUSTMENT
1) 表示文字列
2) デフォルト表示値
3) 最小値
4) 最大値
5) 小さな増分
6) 大きな増分
7) [整数=0 or 浮動=1]
8) [スライダー=0 or ロールボックス=1]

2006年11月06日

 basic2-logo.scm の変更

ドロップシャドウの付いた、タイトルまたはボタンをとりあえず作りたい時、
オリジナルのままではちょっと違うので Script-fu を少し変更します

↓( style='border-width:2px;border-style:outset' )

;  HIGHLIGHT-DROP-SHADOW-LOGO
;  draw the specified text over a background with a drop shadow and a highlight

(define (color-highlight color)
  (let ((r (car color))
    (g (cadr color))
    (b (caddr color)))
    (set! r (+ r (* (- 255 r) 0.75)))
    (set! g (+ g (* (- 255 g) 0.75)))
    (set! b (+ b (* (- 255 b) 0.75)))
    (list r g b)))

(define (apply-basic2ex-logo-effect img
                  logo-layer
                  bg-color
                  text-color)
  (let* ((width (car (gimp-drawable-width logo-layer)))
     (height (car (gimp-drawable-height logo-layer)))
     (posx (- (car (gimp-drawable-offsets logo-layer))))
     (posy (- (cadr (gimp-drawable-offsets logo-layer))))
     (bg-layer (car (gimp-layer-new img width height RGB_IMAGE "Background" 100 NORMAL)))
     (highlight-layer (car (gimp-layer-copy logo-layer TRUE)))
     (shadow-layer (car (gimp-layer-new img width height RGBA_IMAGE "Shadow" 100 MULTIPLY)))
     (old-fg (car (gimp-palette-get-foreground)))
     (old-bg (car (gimp-palette-get-background))))
    (gimp-selection-none img)
    (script-fu-util-image-resize-from-layer img logo-layer)
    (gimp-image-add-layer img bg-layer 1)
    (gimp-image-add-layer img shadow-layer 1)
    (gimp-image-add-layer img highlight-layer 1)
    (gimp-palette-set-foreground text-color)
    (gimp-layer-set-preserve-trans logo-layer TRUE)
    (gimp-edit-fill logo-layer FG-IMAGE-FILL)
    (gimp-edit-clear shadow-layer)
    (gimp-palette-set-foreground (color-highlight text-color))
    (gimp-layer-set-preserve-trans highlight-layer TRUE)
    (gimp-edit-fill highlight-layer FG-IMAGE-FILL)
    (gimp-palette-set-background bg-color)
    (gimp-drawable-fill bg-layer BG-IMAGE-FILL)
    (gimp-selection-layer-alpha logo-layer)
    (gimp-palette-set-background '(0 0 0))
    (gimp-selection-feather img 7.5)
    (gimp-edit-fill shadow-layer BG-IMAGE-FILL)
    (gimp-selection-none img)
    (gimp-palette-set-foreground '(255 255 255))
; グラデーションは使用しない
;    (gimp-blend logo-layer FG-BG-RGB MULTIPLY RADIAL 100 20 REPEAT-NONE FALSE 0 0 0 0 width height)
    (gimp-layer-translate shadow-layer 3 3)
    (gimp-layer-translate highlight-layer (- posx 2) (- posy 2))
    (gimp-layer-set-name highlight-layer "Highlight")
    (gimp-palette-set-background old-bg)
    (gimp-palette-set-foreground old-fg)))

(define (script-fu-basic2ex-logo-alpha img
                     logo-layer
                     bg-color
                     text-color)
  (begin
    (gimp-undo-push-group-start img)
    (apply-basic2ex-logo-effect img logo-layer bg-color text-color)
    (gimp-undo-push-group-end img)
    (gimp-displays-flush)))

(script-fu-register "script-fu-basic2ex-logo-alpha"
            _"<Image>/Script-Fu/Alpha to Logo/Basic II Button..."
            "Creates a simple logo with a shadow and a highlight"
            "Spencer Kimball"
            "Spencer Kimball"
            "1996"
            "RGBA"
                    SF-IMAGE      "Image" 0
                    SF-DRAWABLE   "Drawable" 0
                   SF-COLOR      _"Background Color" '(255 255 255)
            SF-COLOR      _"Text Color" '(206 6 50))

(define (script-fu-basic2ex-logo text
                   size
                   font
                   bg-color
                   text-color)
  (let* ((img (car (gimp-image-new 256 256 RGB)))
     (text-layer (car (gimp-text-fontname img -1 0 0 text 10 TRUE size PIXELS font))))
    (gimp-image-undo-disable img)
    (gimp-layer-set-name text-layer text)
    (apply-basic2ex-logo-effect img text-layer bg-color text-color)
    (gimp-image-undo-enable img)

; lightbox add
    (set! imgwidth (- (car (gimp-image-width img)) 8))
    (set! imgheight (- (car (gimp-image-height img)) 8))
    (gimp-image-resize img imgwidth imgheight -4 -4) 
    (gimp-image-merge-visible-layers img 1)
;

    (gimp-display-new img)))

(script-fu-register "script-fu-basic2ex-logo"
            _"<Toolbox>/Xtns/Script-Fu/Logos lightbox/Basic2Button"
            "Creates a simple logo with a shadow and a highlight"
            "Spencer Kimball"
            "Spencer Kimball"
            "1996"
            ""
            SF-STRING     _"Text" "BUTTON"
            SF-ADJUSTMENT _"Font Size (pixels)" '(24 2 1000 1 10 0 1)
            SF-FONT       _"Font" "-*-futura_poster-*-r-*-*-24-*-*-*-p-*-*-*"
            SF-COLOR      _"Background Color" '(255 255 255)
            SF-COLOR      _"Text Color" '(206 6 50))

上記スクリプトが存在するという前提で、以下、幅指定バージョン

;  HIGHLIGHT-DROP-SHADOW-LOGO
;  draw the specified text over a background with a drop shadow and a highlight

(define (script-fu-lightbox-logo1 text
			       size
			       font
			       baseWidth
			       bg-color
			       text-color)
  (let* ((img (car (gimp-image-new 256 256 RGB)))
	 (text-layer (car (gimp-text-fontname img -1 0 0 text 10 TRUE size PIXELS font))))
    (gimp-image-undo-disable img)
    (gimp-layer-set-name text-layer text)
    (apply-basic2ex-logo-effect img text-layer bg-color text-color)
    (gimp-image-undo-enable img)

; lightbox add
    (set! imgwidth baseWidth)
    (set! imgheight (- (car (gimp-image-height img)) 8))
    (gimp-image-resize img imgwidth imgheight -4 -4)
    (set! new-layer (car (gimp-layer-new img imgwidth imgheight RGB-IMAGE "Layer 1" 100 NORMAL) ) )
    (gimp-image-merge-visible-layers img 1)
    (gimp-image-add-layer img new-layer 1)
    (gimp-drawable-fill new-layer 2)
    (gimp-image-merge-visible-layers img 1)
;
    (gimp-display-new img)))

(script-fu-register "script-fu-lightbox-logo1"
		    _"<Toolbox>/Xtns/Script-Fu/Logos lightbox/Logo1"
		    "Creates a simple logo with a shadow and a highlight"
		    "Spencer Kimball"
		    "Spencer Kimball"
		    "1996"
		    ""
		    SF-STRING     _"Text" "BUTTON"
		    SF-ADJUSTMENT _"Font Size (pixels)" '(24 2 1000 1 10 0 1)
		    SF-FONT       _"Font" "-*-futura_poster-*-r-*-*-24-*-*-*-p-*-*-*"
		    SF-ADJUSTMENT _"Width" '(300 20 2000 1 10 0 1)
		    SF-COLOR      _"Background Color" '(255 255 255)
		    SF-COLOR      _"Text Color" '(206 6 50))

2006年11月05日

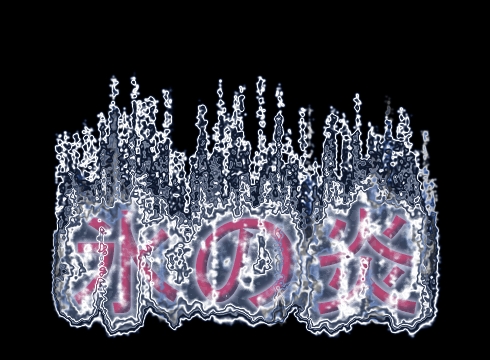
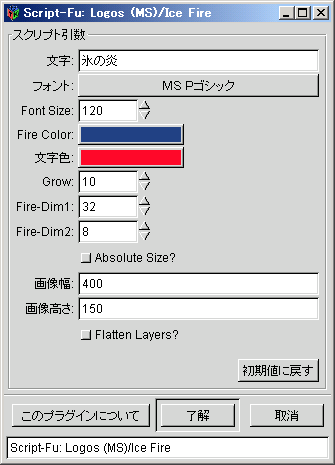
 Ice Fire 確認

【Ice Fire】


lightbox

2006年11月02日

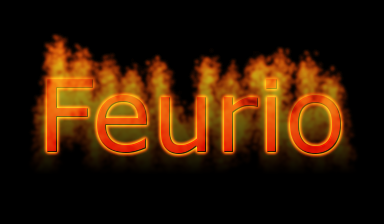
 GIMP 1用 Feurio の Script調整

仕様は解りませんが、全く解らないものでも無いので。
GIMP 1 では炎の開始位置が上すぎて、ダウンロードサイトのサンプルのようにはなりません。
以下の赤い部分を追加して、デフォルトを変更しましょう。

    (gimp-layer-set-offsets   theText theBufferX theBufferY)
    (gimp-floating-sel-anchor theText theLayer)

    (set! theBufferY (/ (- imgHeight theTextHeight) 0.9) )

※ 0.9 をもっと少なくすると、おもしろい事になります

↓デフォルト変更

(script-fu-register
  "script-fu-feurio-logo"
  "<Toolbox>/Xtns/Script-Fu/Logos (MS)/Feurio..."
  "Creates a burning text logo."
  "Michael Schalla"
  "Michael Schalla"
  "October 2002"
  ""
  SF-STRING "Text"               "Feurio"
  SF-FONT   "Font"               "-*-Arial Black-*-r-*-*-24-*-*-*-p-*-*-*"
  SF-ADJUSTMENT "Font Size"      '(100 2 1000 1 10 0 1)
  SF-COLOR  "Color"              '(224 0 0)
  SF-ADJUSTMENT "Red 1"          '(64 0 255 1 1 0 1)
  SF-ADJUSTMENT "Red 2"          '(224 0 255 1 1 0 1)
  SF-ADJUSTMENT "Green 1"        '(128 0 255 1 1 0 1)
  SF-ADJUSTMENT "Green 2"        '(192 0 255 1 1 0 1)
  SF-ADJUSTMENT "Blue 1"         '(224 0 255 1 1 0 1)
  SF-ADJUSTMENT "Blue 2"         '(64 0 255 1 1 0 1)
  SF-ADJUSTMENT "Flame Height"   '(25 1 1000 1 1 1 1)
  SF-ADJUSTMENT "Blur Radius"    '(5 1 100 1 1 1 1)
  SF-TOGGLE "Absolute Size?"     TRUE
  SF-VALUE  "Image Width"        "400"
  SF-VALUE  "Image Height"       "150"
  SF-TOGGLE "Flatten Layers?"    FALSE
)

↓GIMP2 だと変更しなくてもこうなりますが、GIMP1 のほうが安定しているので
feurio2.png


lightbox

 追加 Script for GIMP 1.2.5


【Feurio】

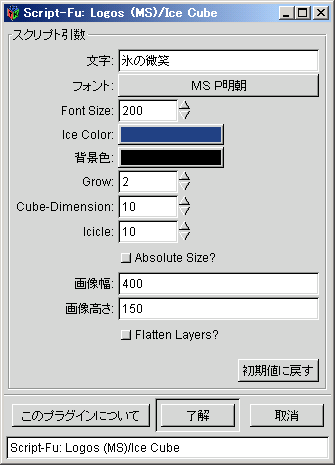
【Ice Cube】


lightbox

2006年10月29日

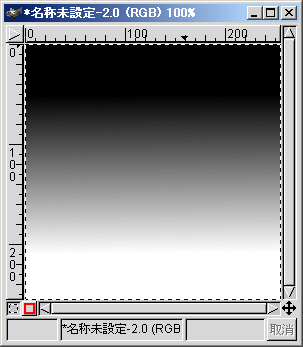
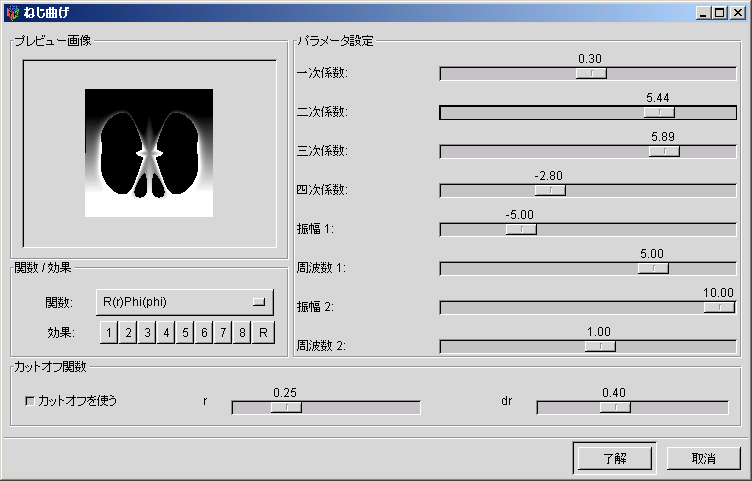
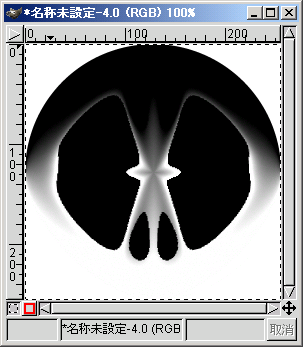
 ねじ曲げ効果

元絵によって、再現しづらいので注意

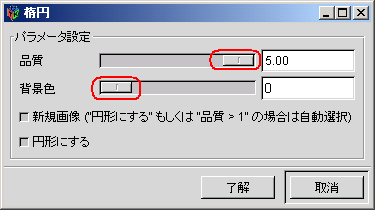
ガラス効果 の 「楕円」


2006年10月20日

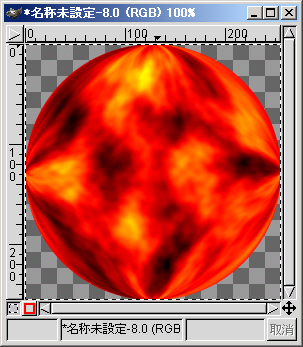
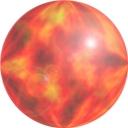
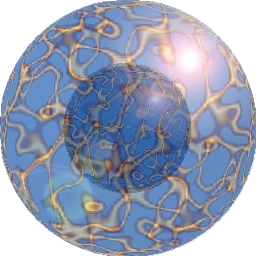
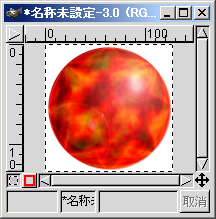
 ガラス球の作成


ガラス球用の模様を作成
( 何でも OK、いろいろ試してみるべし )

( アルファチャンネルの無いパターンでは、追加する )
「フィルタ」->「ガラス効果」->「楕円」
( 「レンズ効果」でも可。但し画像や屈折率によっては画像が劣化するので注意 )


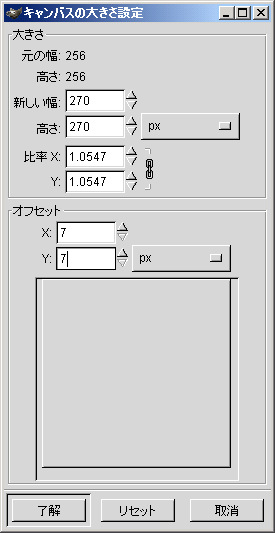
画像の上下左右に余裕を持たせる為、「画像」->「キャンバスサイズ」で
サイズと画像開始位置を変更

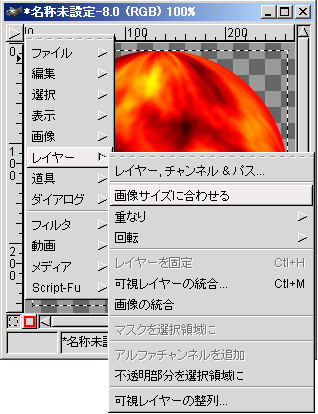
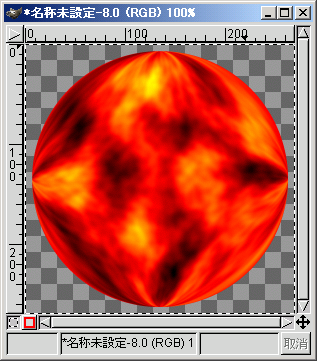
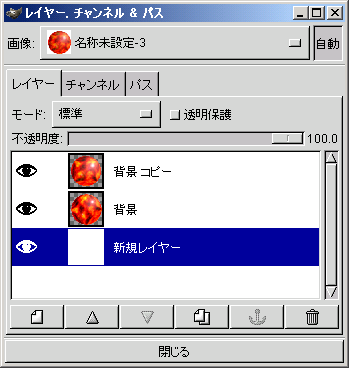
大きくした画像サイズにレイヤーのサイズをあわせる


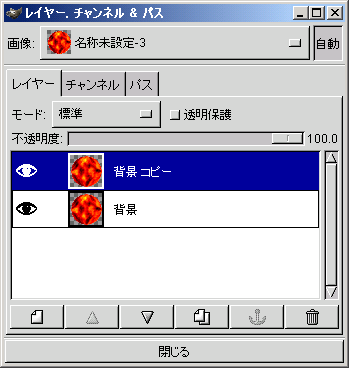
レイヤーを複製する

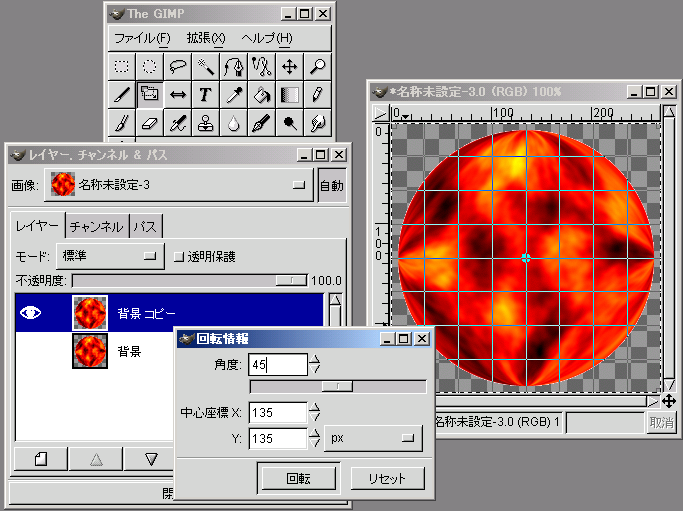
複製したレイヤーの画像を45度回転させる

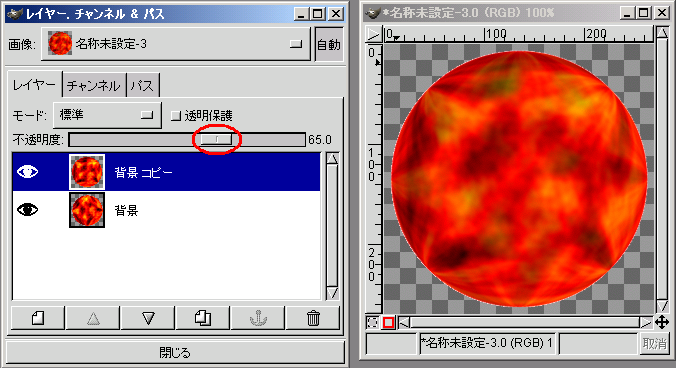
回転した画像を持つレイヤーの不透明度を変更
( 別のレイヤーの不透明度も変更すると、透明感が上がる )

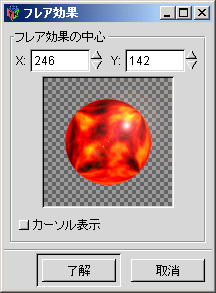
レイヤー毎に、「フィルタ」->「ライト効果」->「フレア効果」を2回づつ適用する

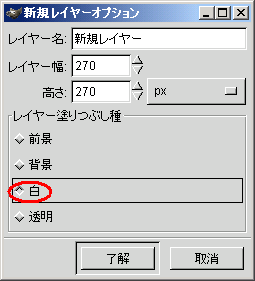
白い新規レイヤーを追加して背景とする


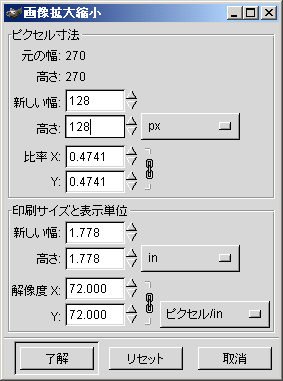
必要ならば、画像を縮小する

完成


2006年10月19日

 選択領域の交わり


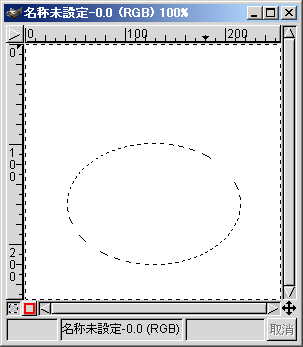
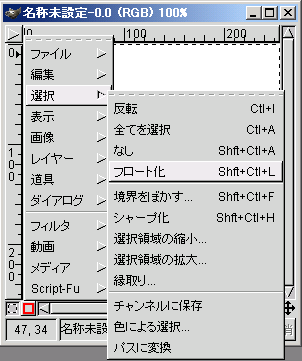
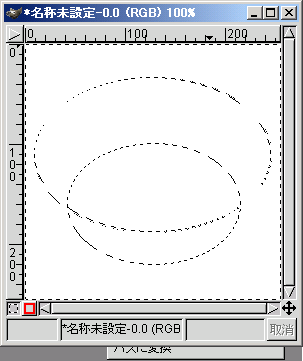
要するに、レイヤーに描画された画像に対して選択して処理をするという事なのですが、
以下の手順は「直感的」に作業できると思います。

楕円選択

フロート化

二つ目の選択領域

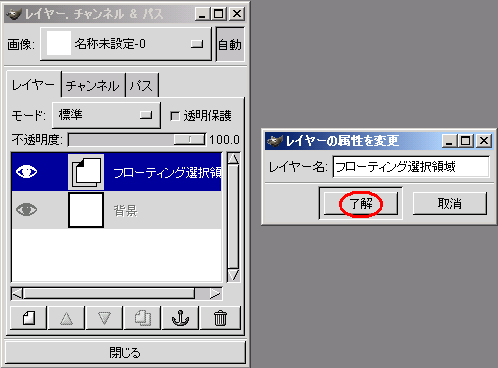
フローティング選択領域をダブルクリックしてレイヤーとして確定

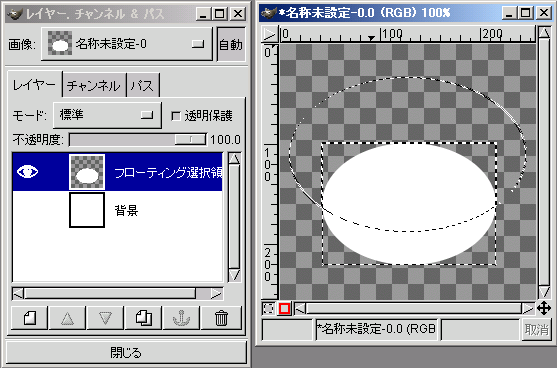
このレイヤーを選択して、このレイヤー以外を非表示

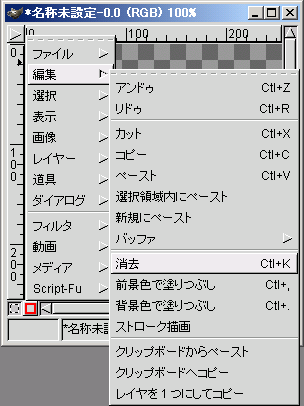
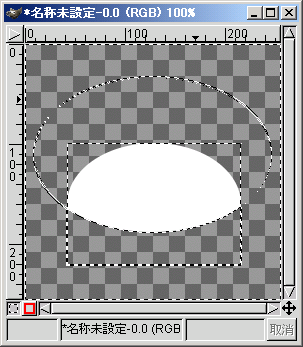
消去

完成

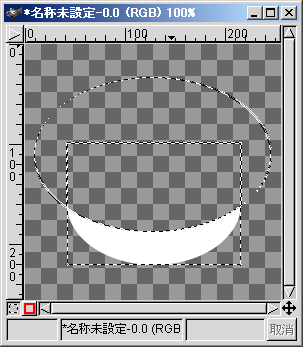
※1 長方形はレイヤーの境界。
※2 楕円は、一時的な選択境界( 選択メニューの「なし」で解除 )


選択を反転させて消去した場合